What you’ll need
- Access to the Azure portal for your organization with rights to create app registrations in Microsoft Entra ID.
- Your Aperium deployment URL (for example
https://app.your-company.com).
Setup
Create the app registration
Sign in to the Azure portal and search for Microsoft Entra ID (formerly Azure Active Directory). Open App registrations and click + New registration.
-
Name: Anything descriptive (for example
Aperium Microsoft 365 Integration). -
Supported account types: Select Accounts in any organizational directory (Any Microsoft Entra ID tenant) and personal Microsoft accounts. Aperium uses the multi-tenant
commonendpoint, so this option is required for most deployments. -
Redirect URI: Choose Web for the platform and enter:
For local development, use
http://localhost:8080/api/v1/microsoft365/auth/callback.
Copy the Application (client) ID
On the app’s Overview page, copy the Application (client) ID. This is the value you’ll paste into Aperium as OAuth Client ID later.
Create a client secret
In the left panel of the app, open Certificates & secrets, switch to the Client secrets tab, and click + New client secret.
- Add a description (for example
Aperium). - Pick an expiry. 24 months is a common choice; plan to rotate the secret before it expires.
Add Microsoft Graph API permissions
Open the API permissions tab, click + Add a permission, choose Microsoft Graph, and pick Delegated permissions. Add every permission below.Identity (always required)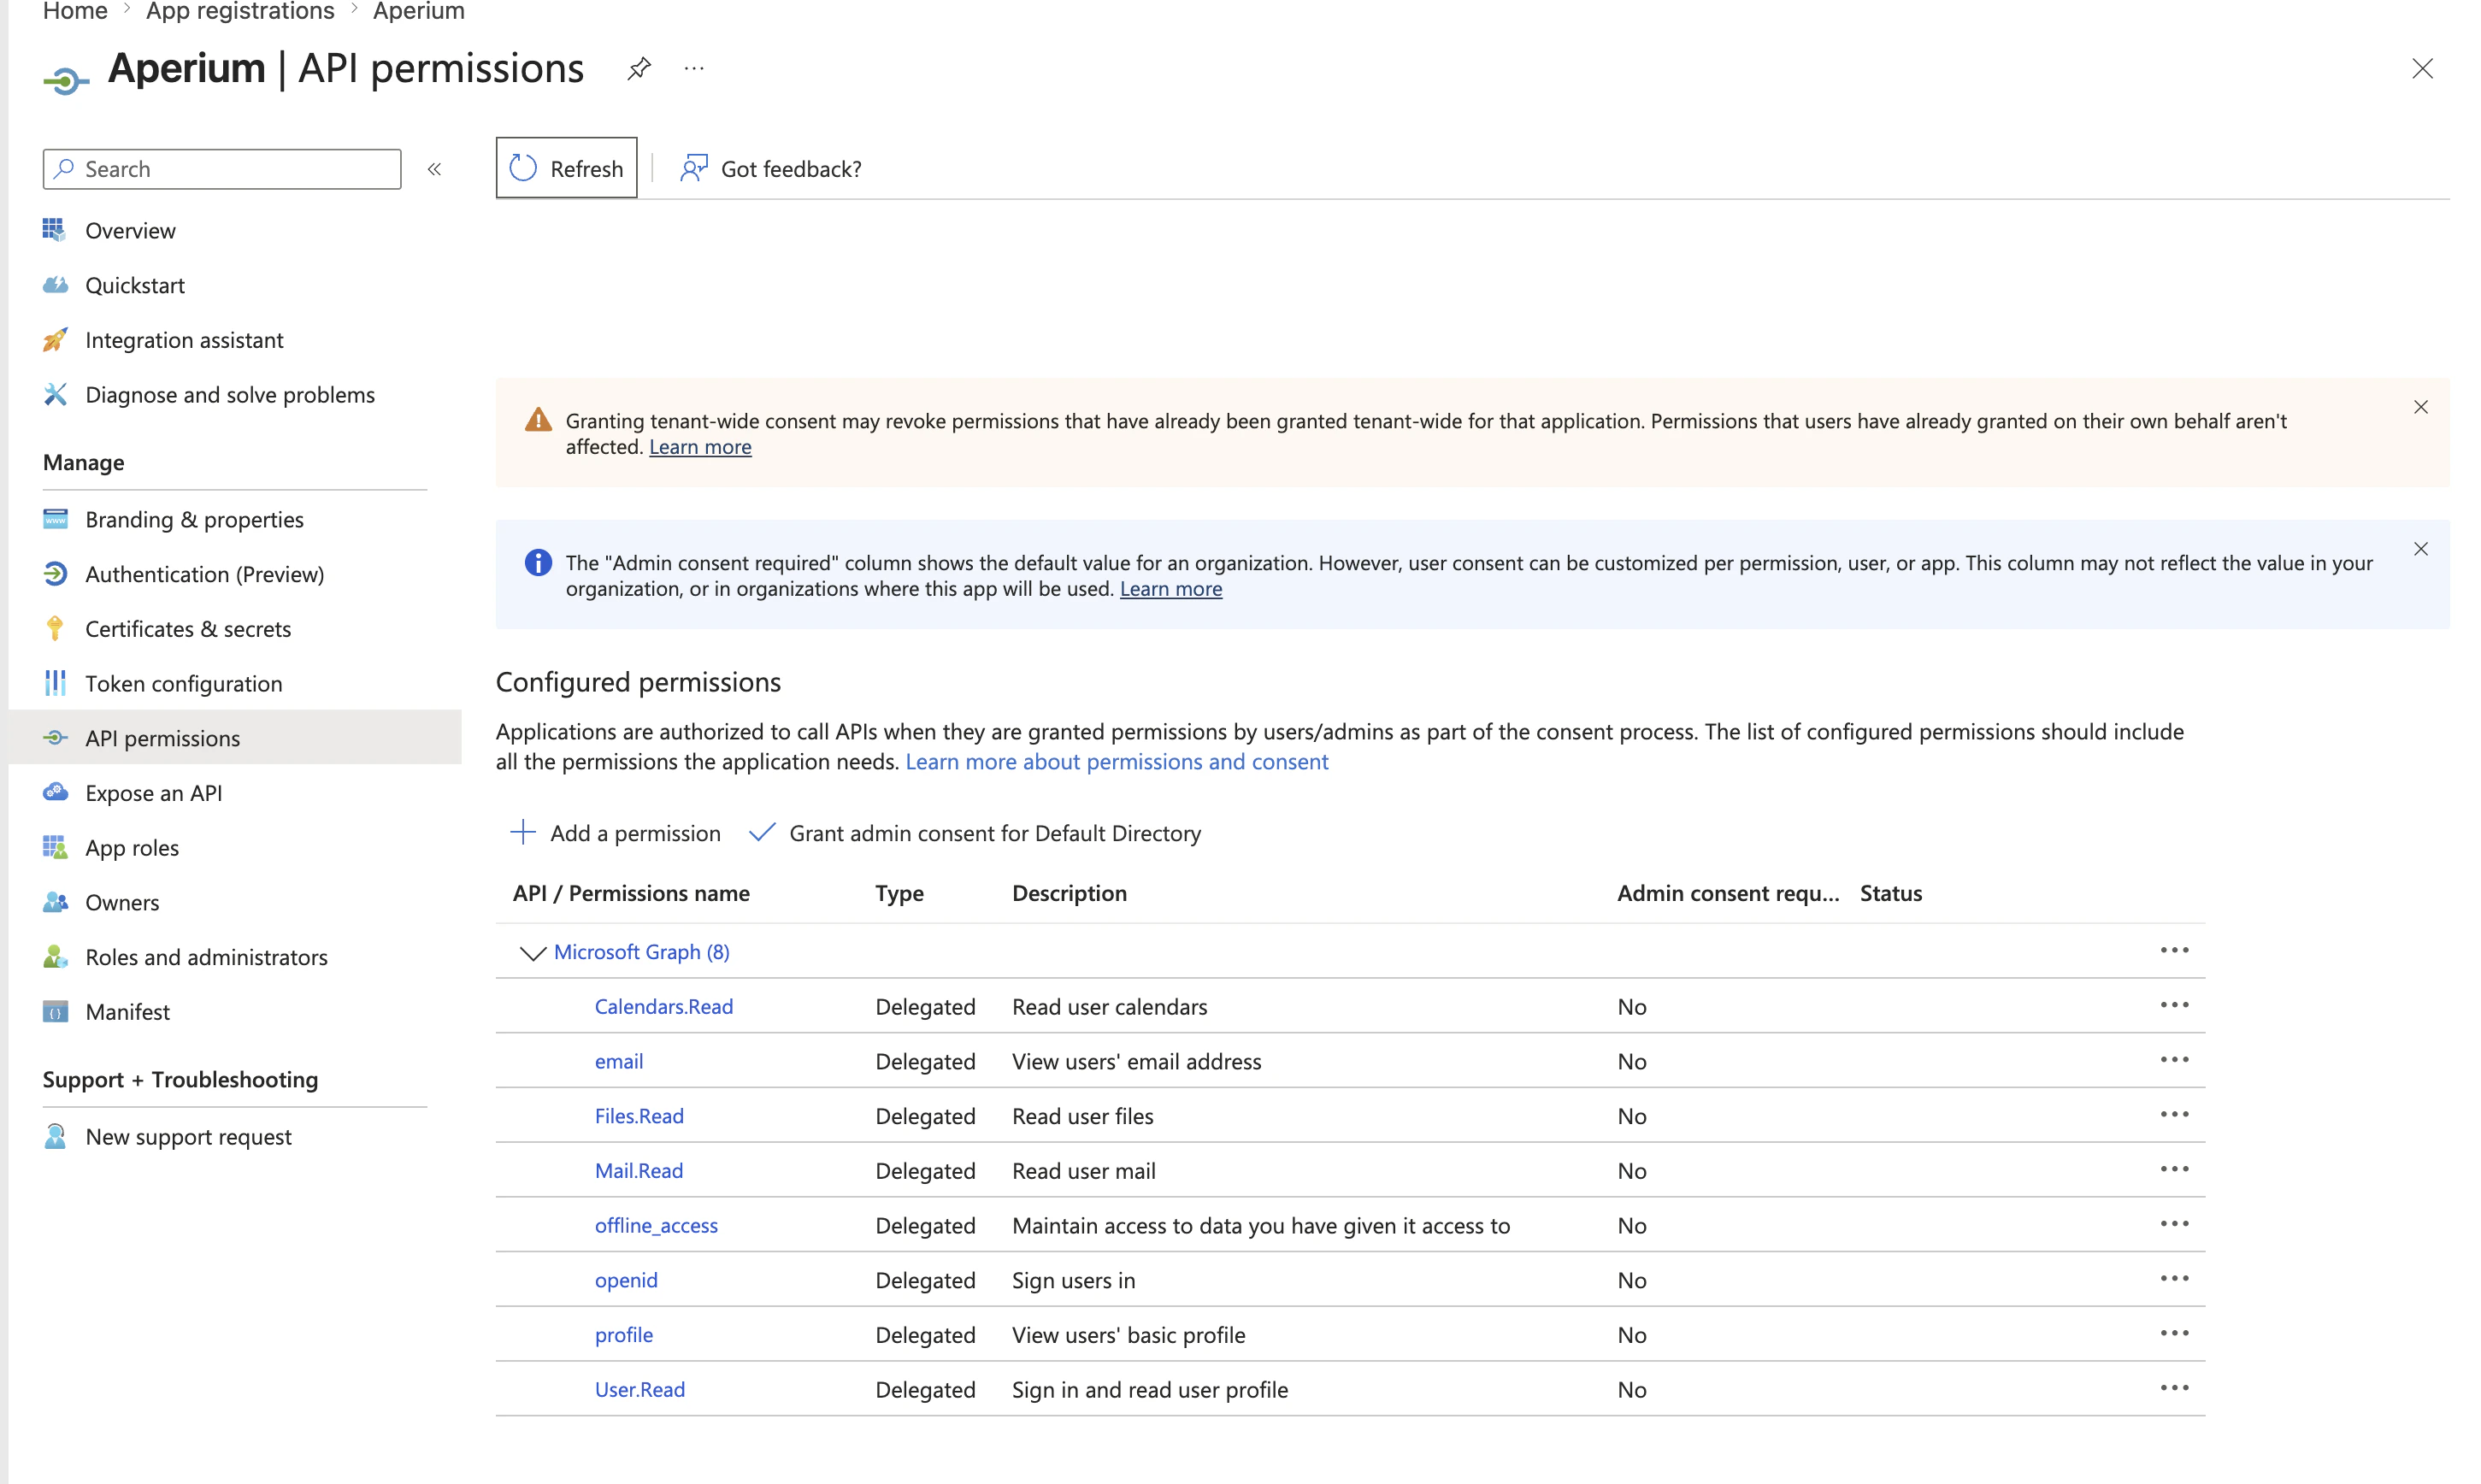
openidemailprofileoffline_accessUser.Read
Mail.ReadMail.SendMail.ReadWrite
Calendars.Read
Files.ReadFiles.ReadWrite
Paste the credentials into Aperium
Open Aperium and go to either the admin onboarding flow (first sign-in) or the Admin Console’s MCP Servers tab (any time after). Open the Connect Aperium to Microsoft 365 form and fill in: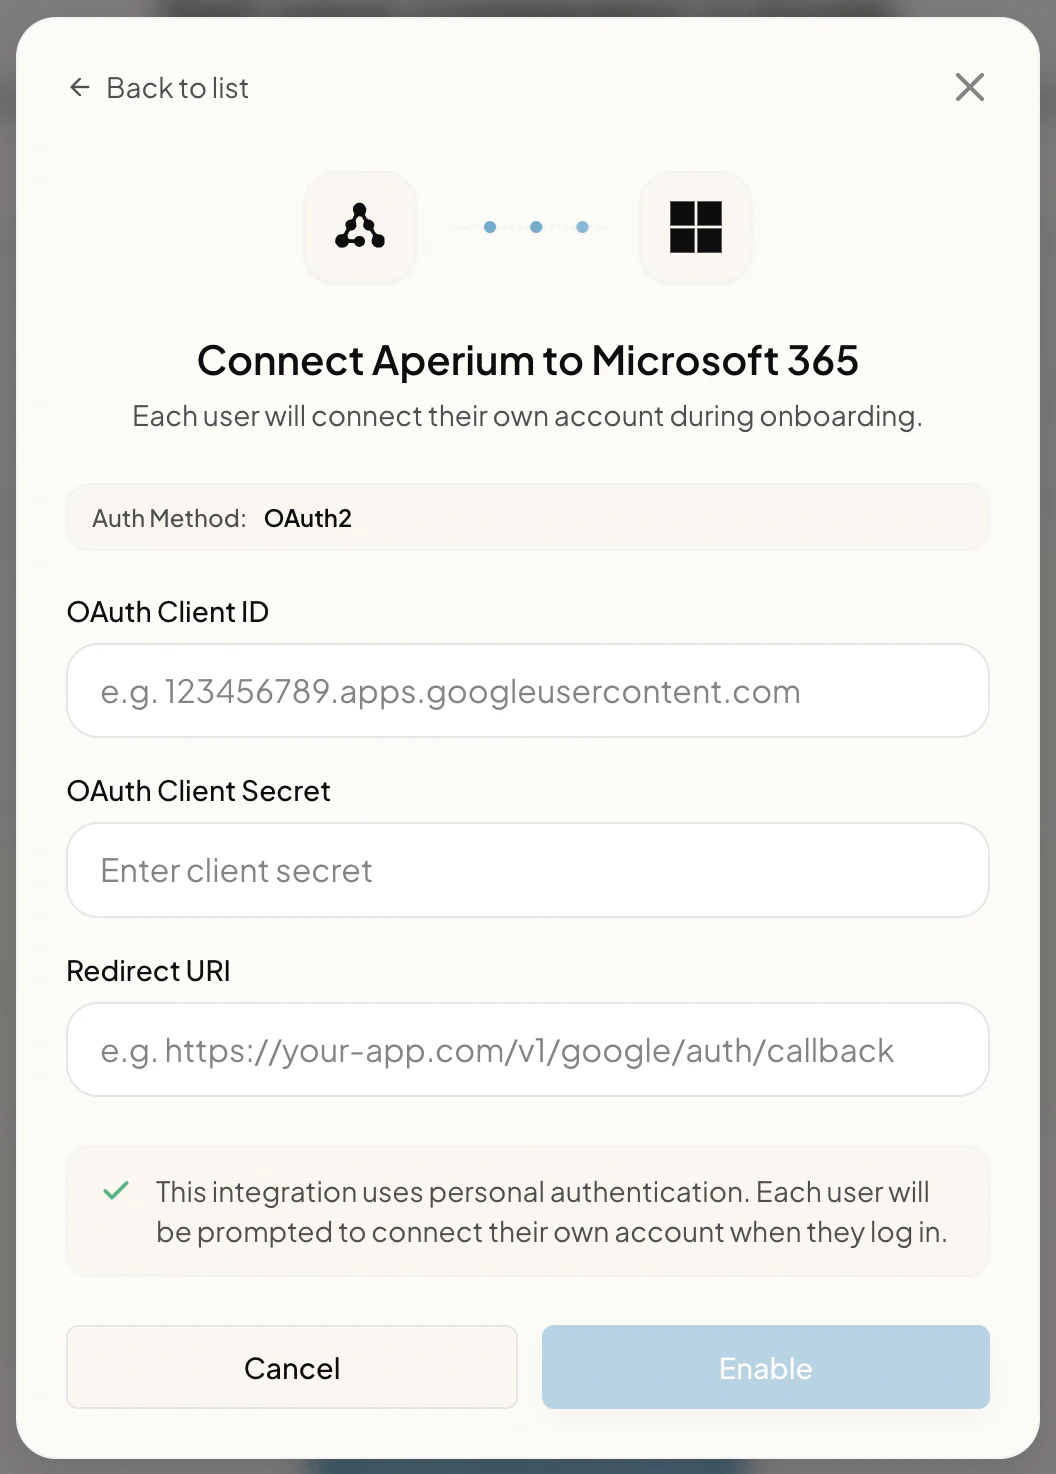
- OAuth Client ID. The Application (client) ID copied in step 2.
- OAuth Client Secret. The client secret value copied in step 3.
- Redirect URI. The same redirect URI you registered in step 1 (for example
https://<your-aperium-domain>/api/v1/microsoft365/auth/callback).
What users see
After admin setup is complete, users land on the Connect your tools page (during onboarding) or the Integrations page (any time after). They click Link Account on the Microsoft 365 tile, are redirected to Microsoft’s consent screen, review the requested permissions, and click Accept to finish linking.Notes
- Single-tenant deployments. If you only want users from one specific Entra ID tenant to be able to link their accounts, register the app as single-tenant in step 1 instead. You’ll also need to override Aperium’s default
commonauthority with your tenant’s GUID at deploy time. - Secret rotation. Client secrets expire on the schedule you chose. Add a calendar reminder a few weeks before the expiry to create a new secret and update the credentials in the Admin Console’s MCP Servers tab.