Connecting an integration
The example below walks through connecting Google Workspace as an admin and then linking a personal account as a user. The same general process applies to all integrations.Pick the categories of tools your company uses
On first sign-in, an admin lands on Set your company’s tools. Each tile is a category. Click any category your team uses (Email, Calendar, ERP, CRM, and so on) to open it.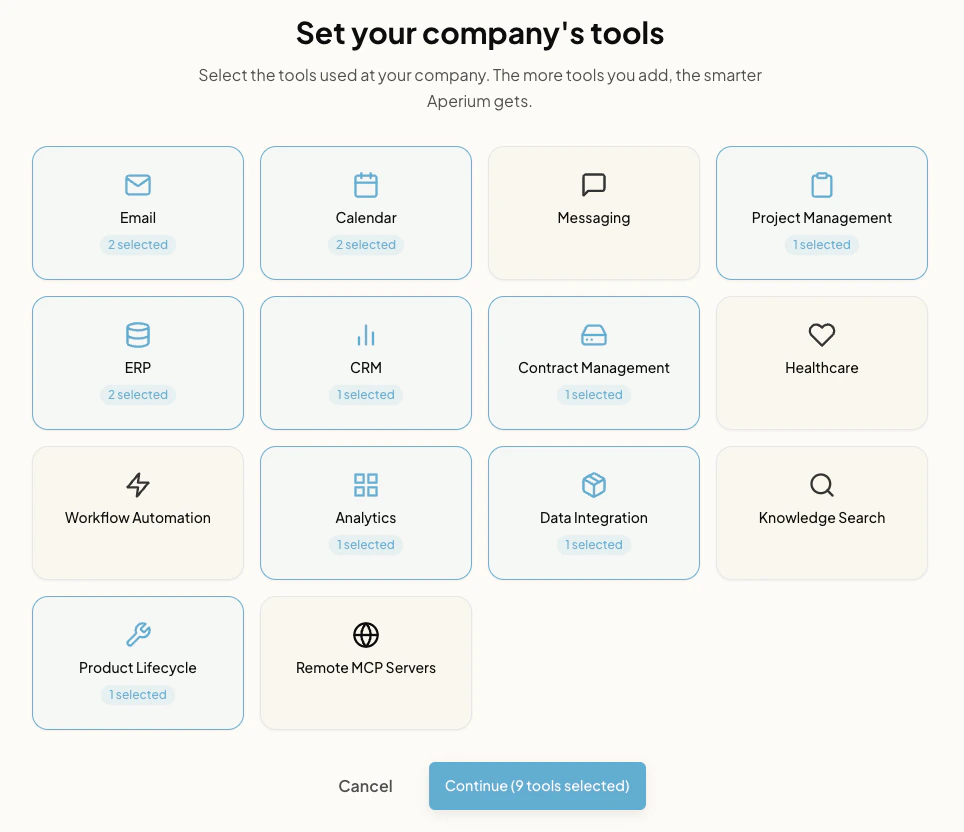
Open the category modal
Clicking a category immediately opens a modal listing the integrations available in that category.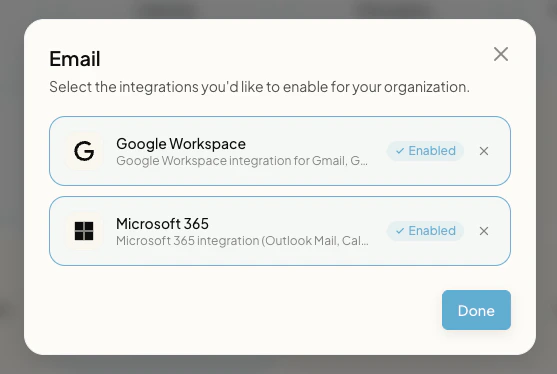
Configure each integration you want to enable
Inside the modal, click the integration you want to set up. A configuration form opens for that integration. Each integration requires a different set of credentials and fields, so the form changes based on which one you picked. In this example, configuring Google Workspace asks for the OAuth Client ID, OAuth Client Secret, and Redirect URI. Fill in the fields and click Enable.Repeat for every integration in the category, then click Done to return to the category list.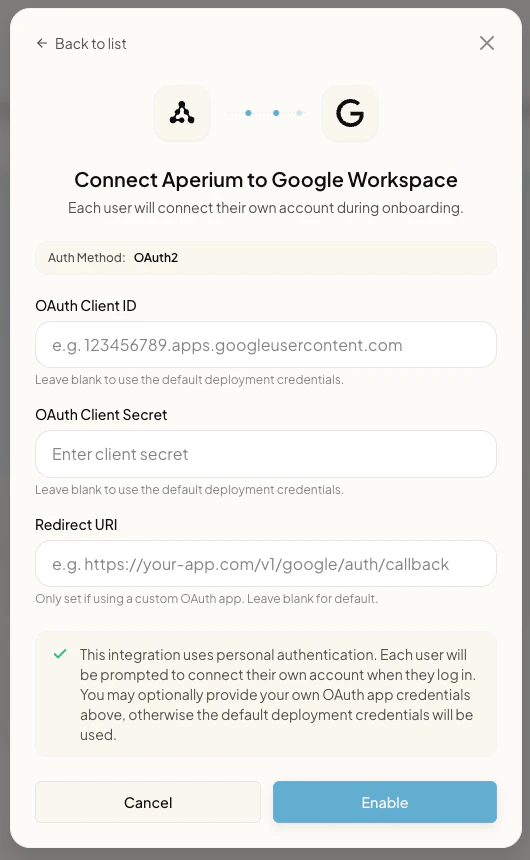
Each user links their own account
After admin setup is done, every user sees a Connect your tools page. OAuth integrations show Link Account; tenant-wide integrations show Managed by your admin; integrations that accept personal tokens show Add personal.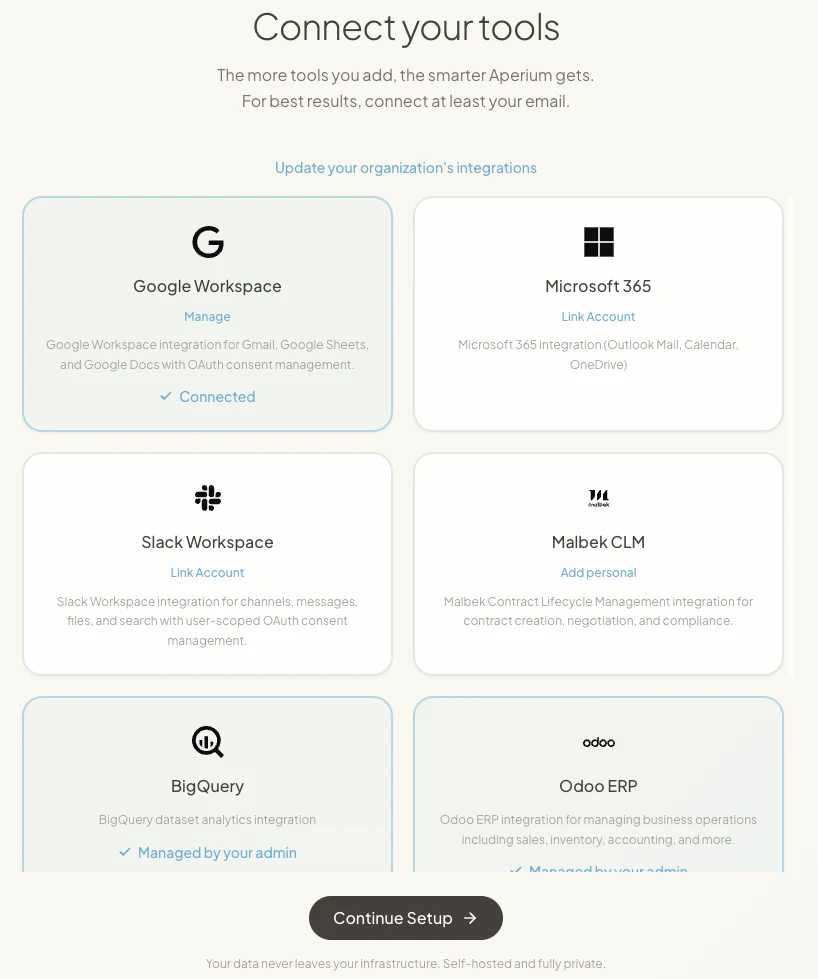
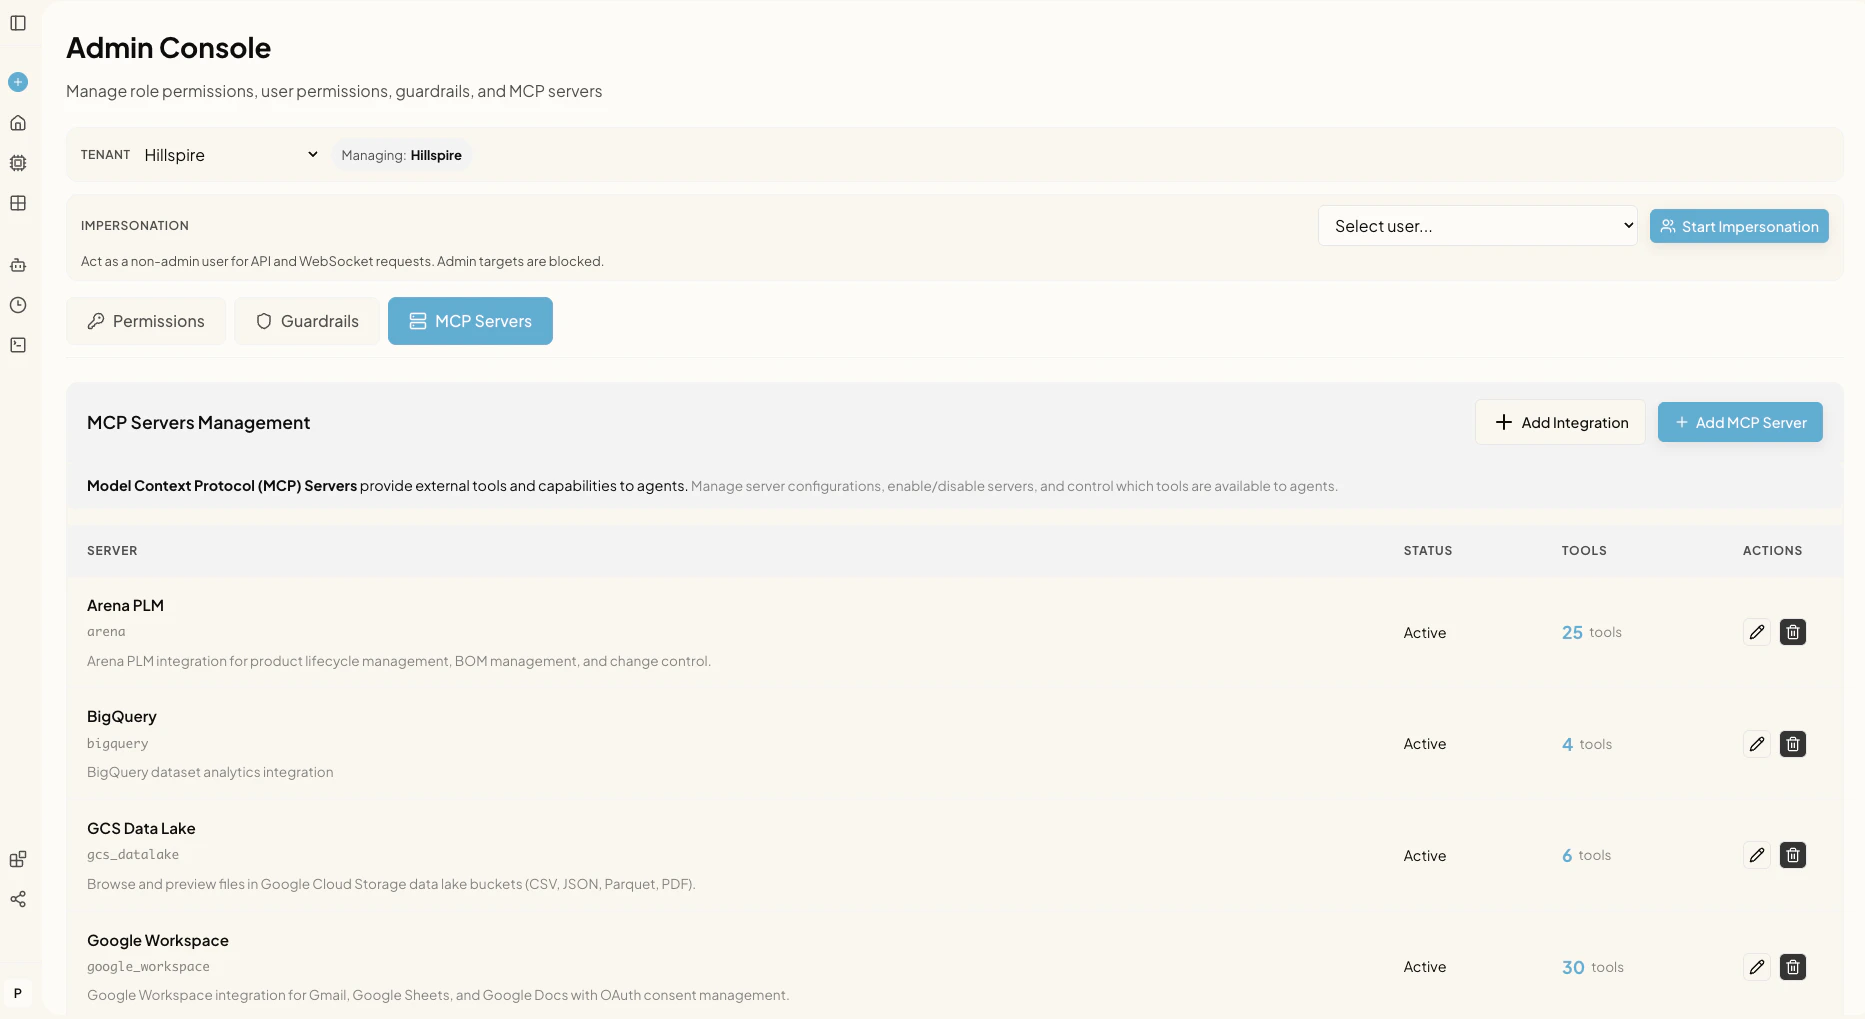
How integrations work under the hood
Aperium connects to external systems through MCP (Model Context Protocol) servers. Each connector exposes a set of tools that agents can call.Integration auth models
Aperium supports three auth models based on who supplies the credentials. In every case, an admin enters configuration through the admin onboarding flow the first time they sign in or through the Admin Console’s MCP Servers tab at any point afterward. Credentials are stored against the tenant in Aperium’s database, not in environment variables.OAuth integrations
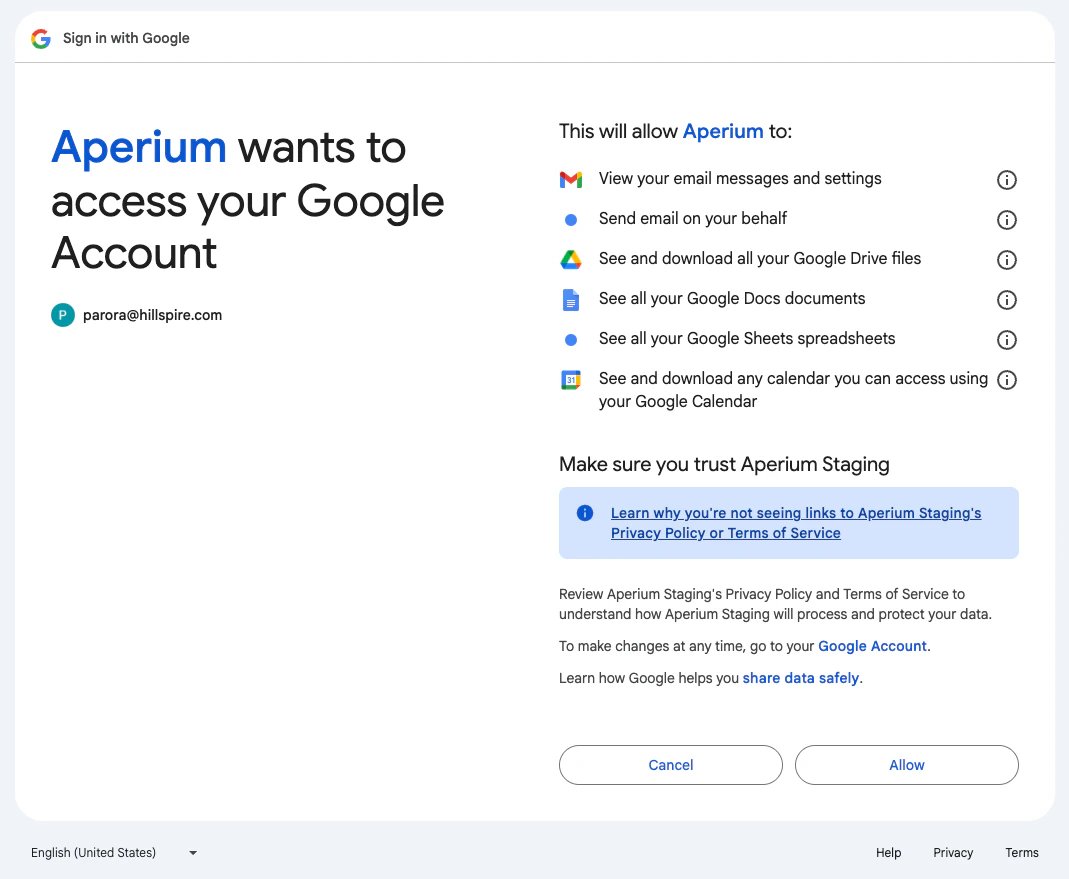
Each user links their own account through an OAuth flow. The admin configures the OAuth client once (client ID, client secret, redirect URI). After that, each user clicks Connect on the Integrations page and consents to the requested scopes.Examples:
google_workspace, slack_workspace, atlassian, microsoft365.Configured tenant-wide integrations
An admin enters one set of credentials and every user in the tenant shares the same connection. No per-user setup is needed.Examples:
arena, malbek, prefect, bigquery, postgres, gcs_datalake, epic.Tenant-wide integrations with personal tokens
An admin sets up the integration at the tenant level, and individual users supply their own token, key, or username/password. This comes in two flavors:
- Required personal token. Each user must add their own credential before they can use the integration. Example:
onyx(admin enters the URL; each user adds their own Onyx token). - Optional personal token. The tenant-wide configuration works for everyone with a default permission set, but users can choose to add a personal token if they want different access (for example, scoped to their own permissions in the upstream system). Examples:
odoo,salesforce,netsuite.
Where integrations live in the product
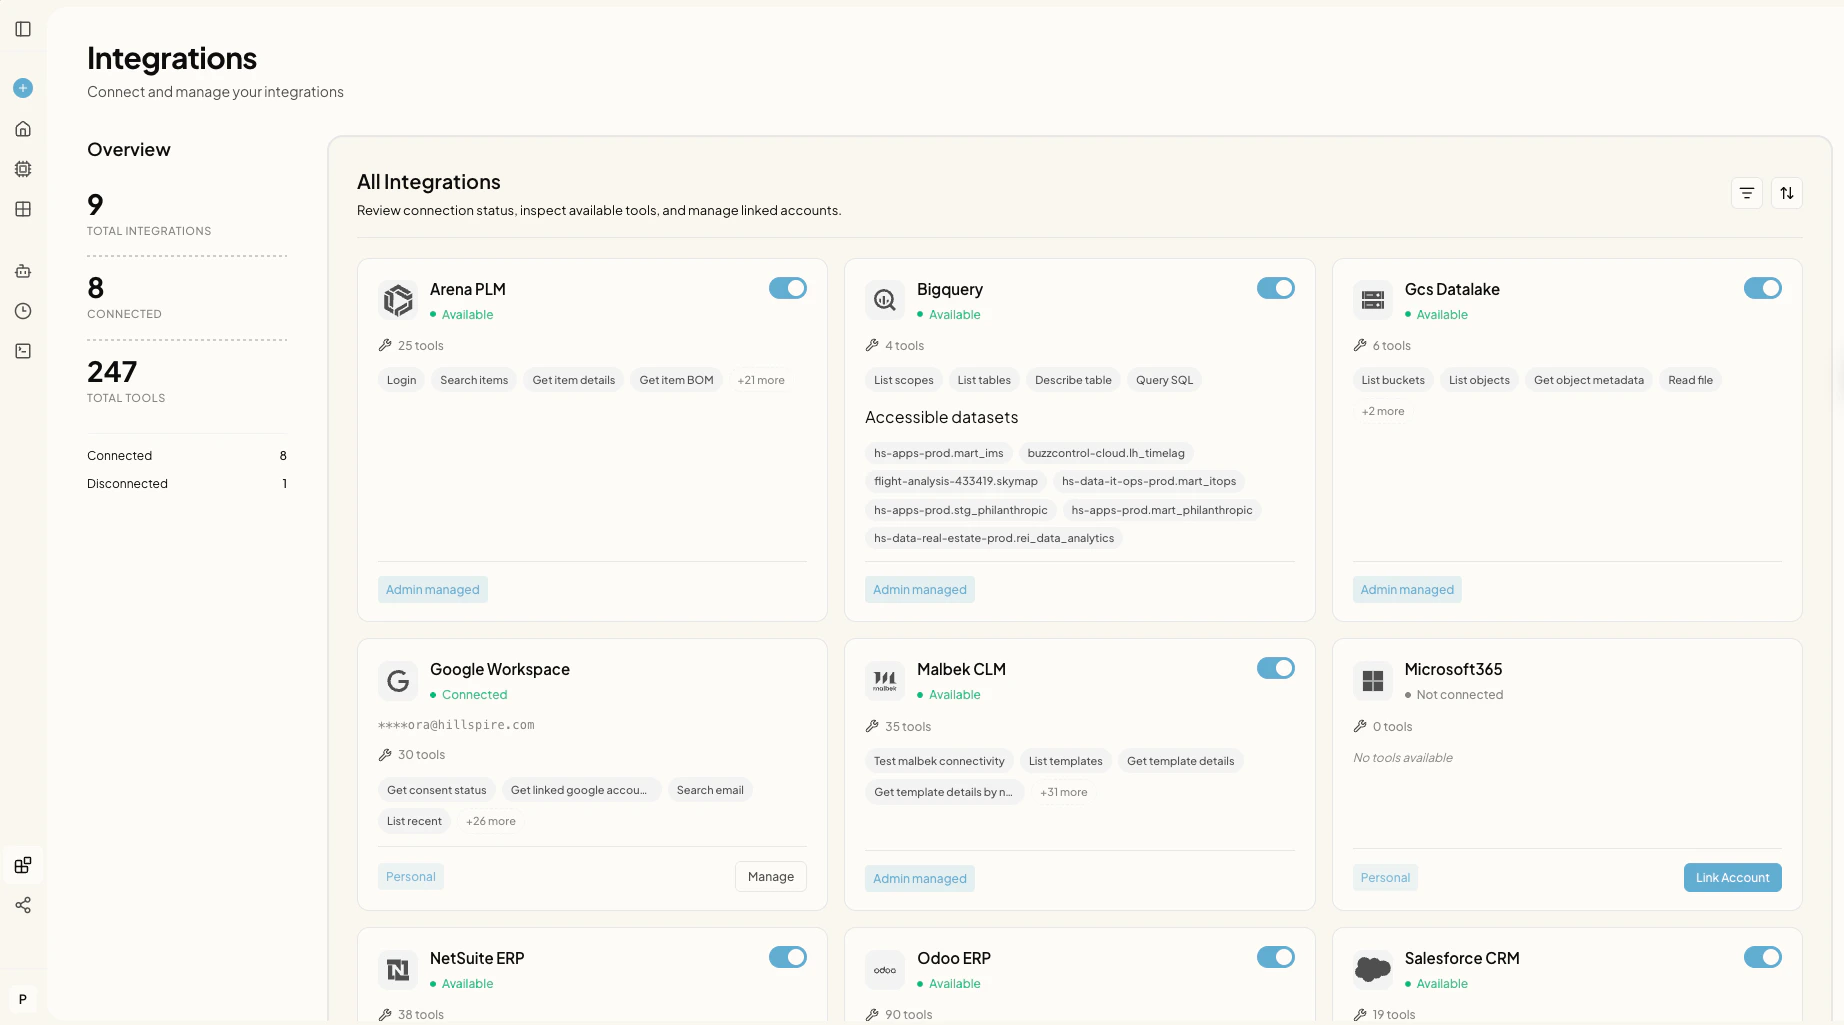
Integrations page (/integrations). Available to every user. Shows all integrations the tenant has configured, the connection status for each, and tools per connector. OAuth connectors expose Connect, Manage, and Reauthorize actions. Integrations that accept personal tokens expose a field where users can add or update their own credential.